Team Management - Agent Account Management
Agents are the core role in conversations. Proper account and status management ensures that seat resources are used efficiently. In this section, you can create/delete agent accounts, reset passwords, and control who can be online based on your available seats.
How to add or delete agents in the system?
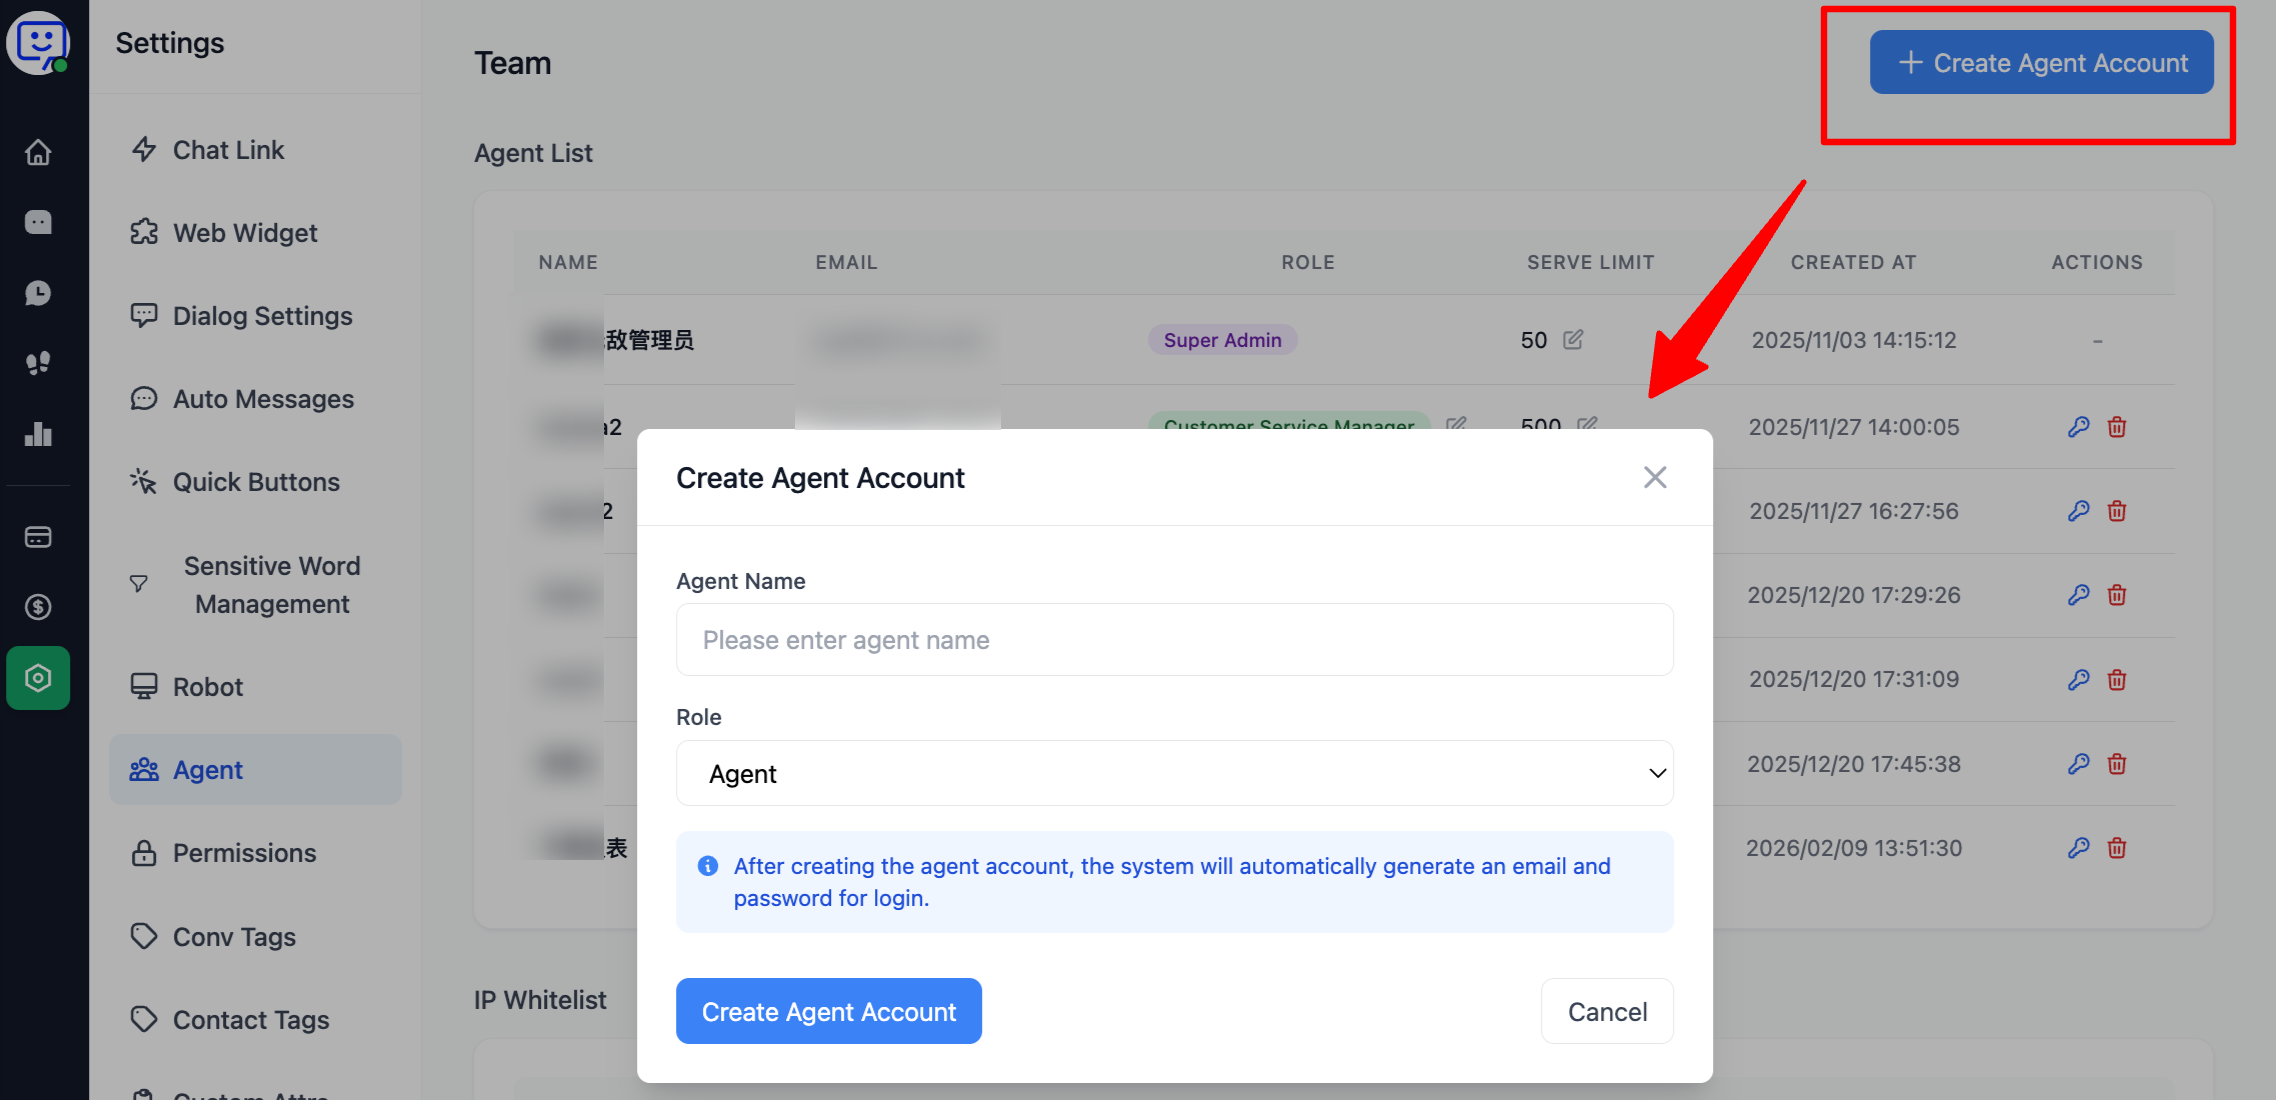
- Add an agent: Click "Settings" at the bottom of the left navigation bar, then select "Agent Management". Click "Add Agent Account".
- In the popup, enter the agent's name and select a role to generate the agent account.
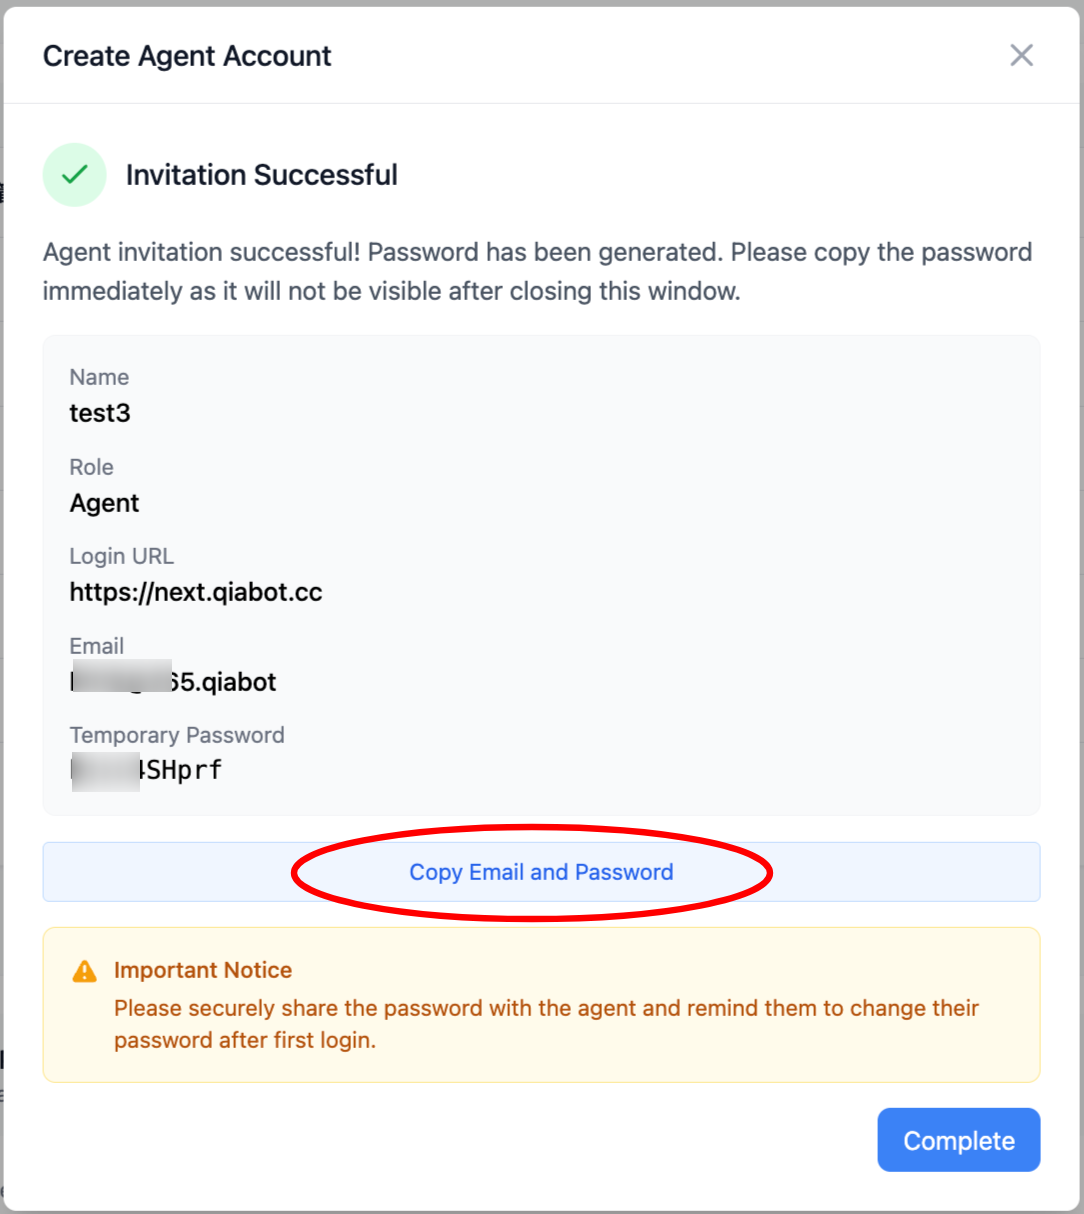
- In the second popup, copy the agent's email and password, and send them to the agent. They can log in from the login page using these credentials.
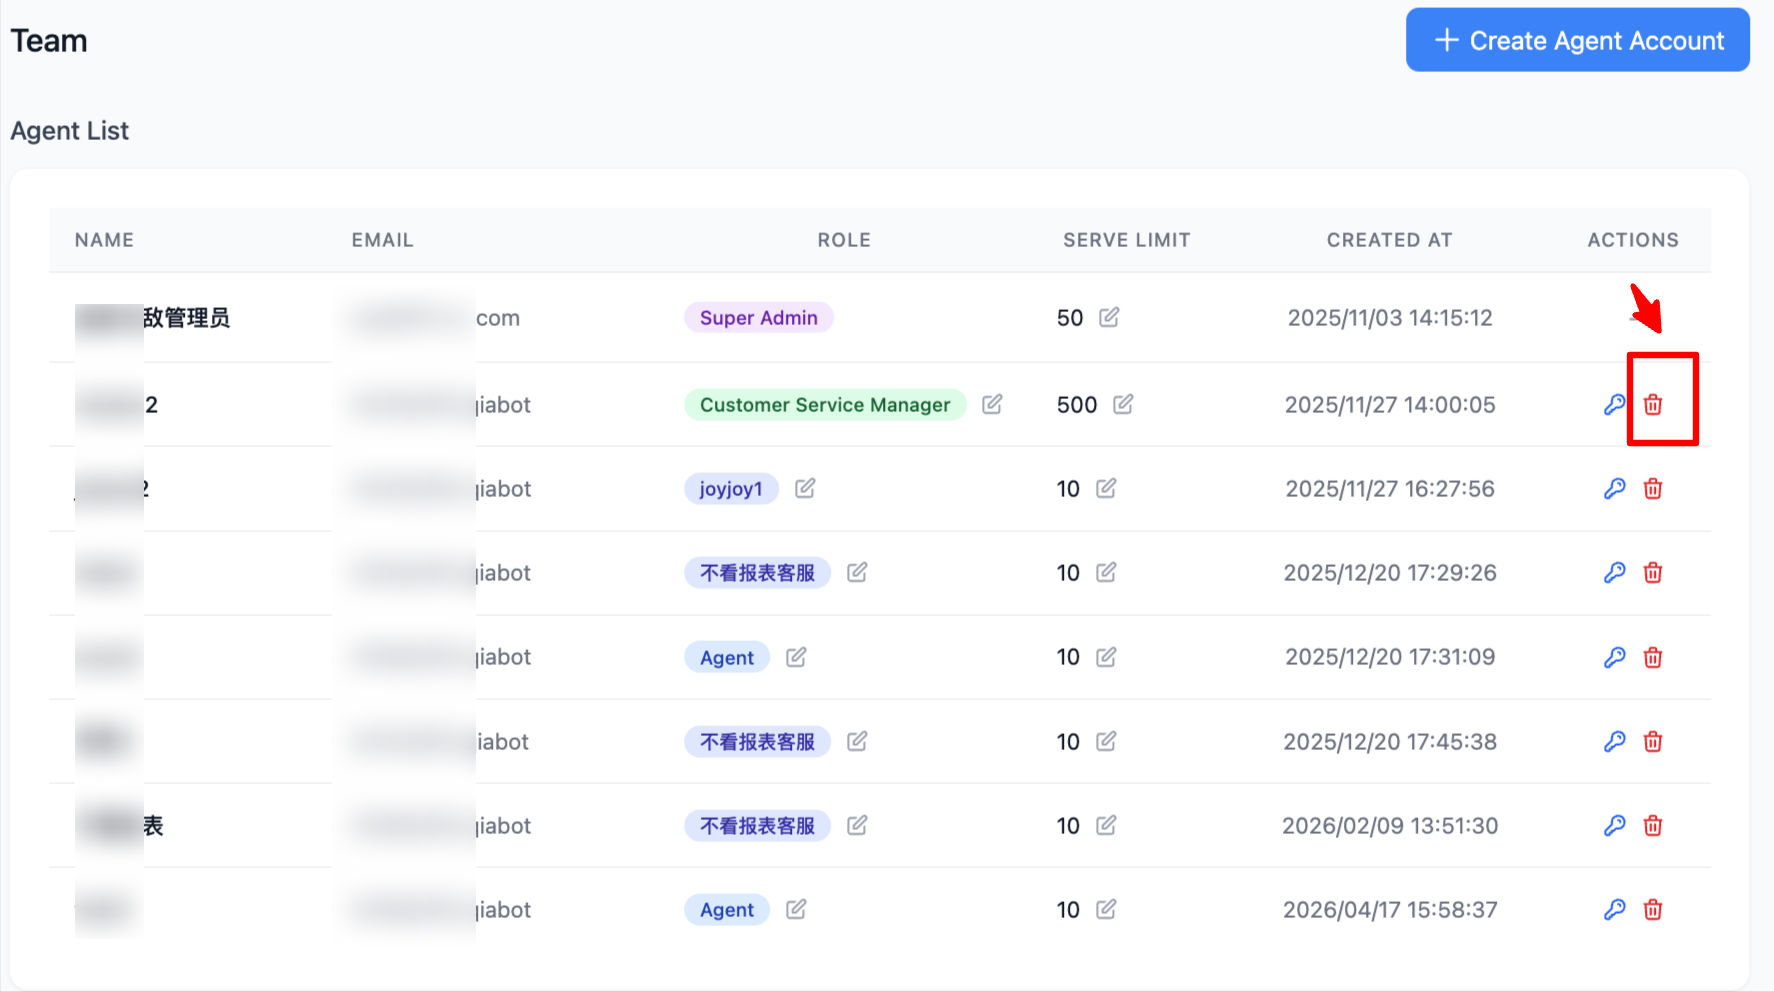
2.Delete an agent: On the "Agent Management" page, click the red trash can button to delete the agent.
Warning ⚠️! This action cannot be undone, so please proceed with caution.
3.Reset an agent's password: On the "Agent Management" page, click the blue key button to reset the agent's password. In the popup, enter the new password.
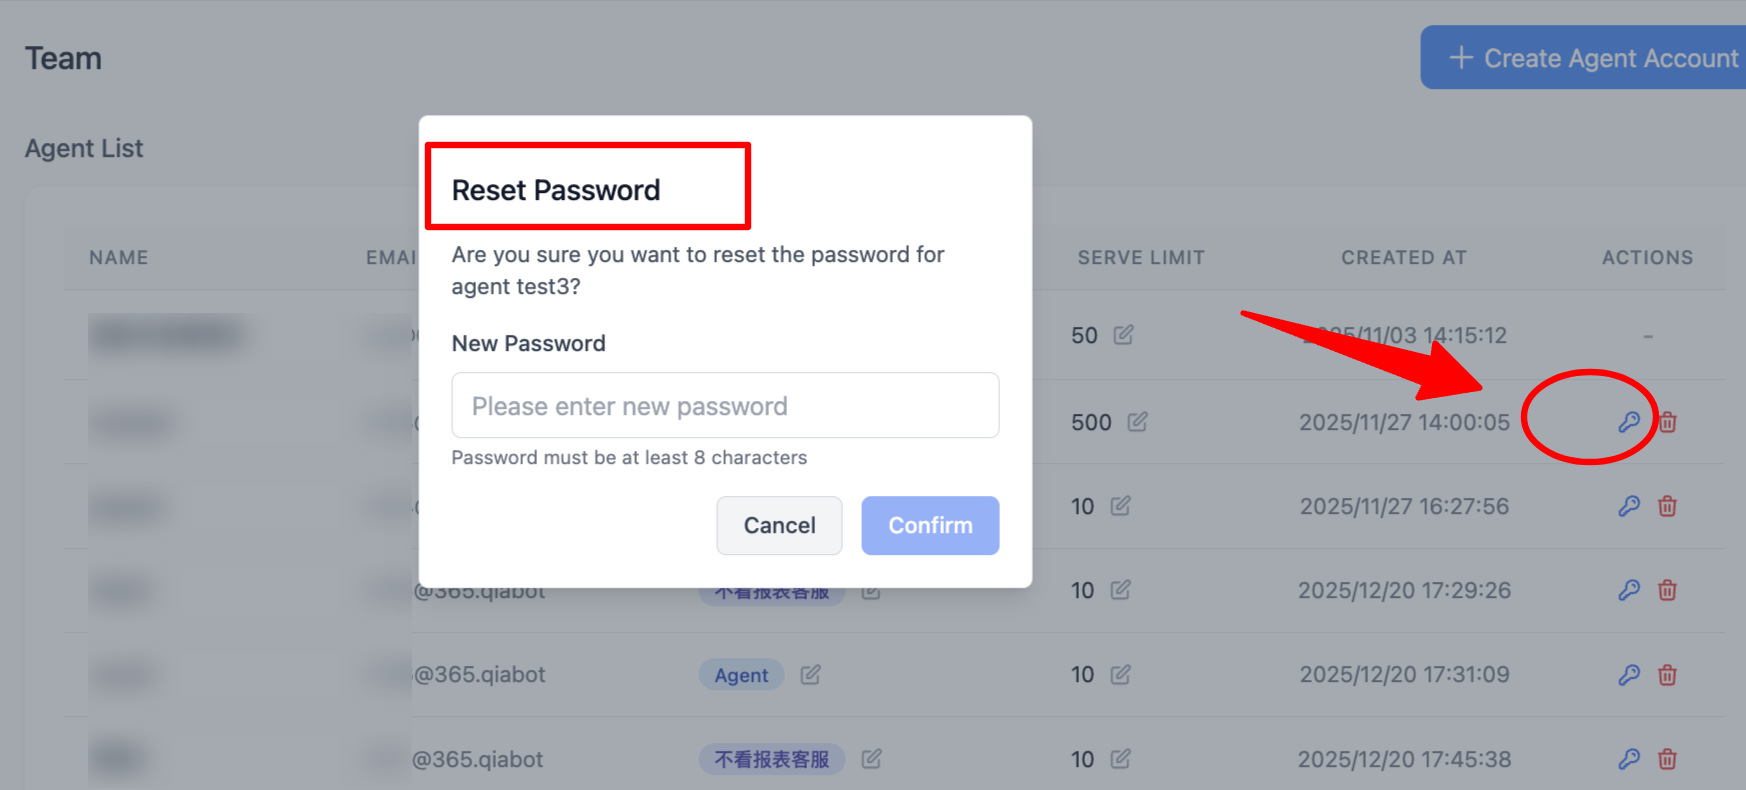
After resetting, it is recommended to notify the agent to log in and change the password to one only they know.
How to change agent status?
- Go to the system home page.
In the "Agent Status" section at the bottom, you can see the status of all agents, including their current status, total conversations handled, and current active conversations. Super administrators can also manage agent status, such as setting them to "Online", "Invisible", or even forcing them offline.
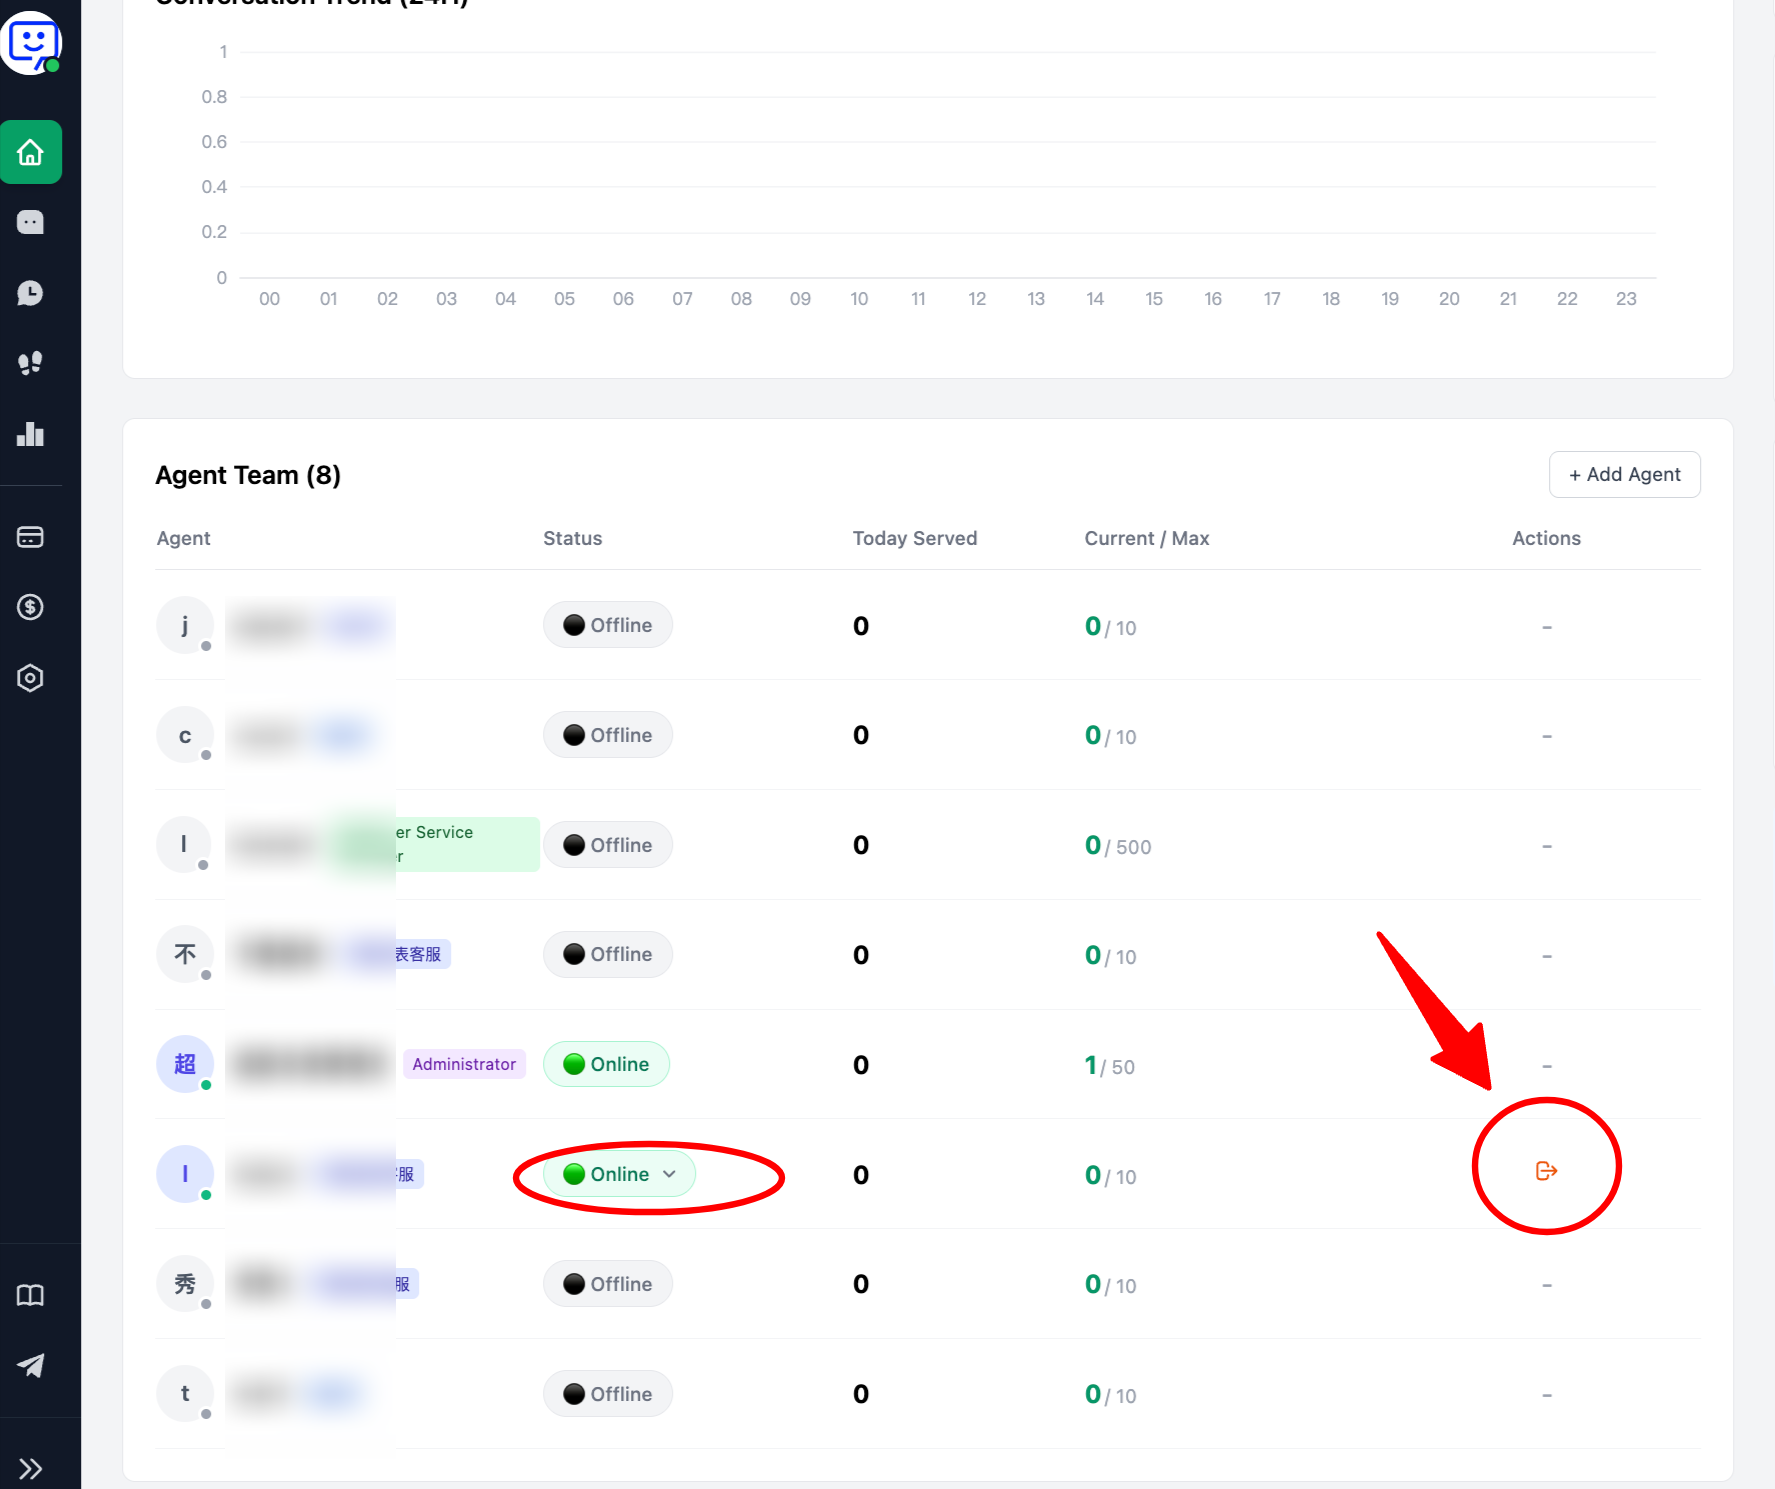
Warning ⚠️! The seat count refers to the number of accounts that can be online and serving simultaneously.
You can create more agent accounts than your seat limit, but the number of accounts serving simultaneously is restricted.
Therefore, when an agent is online and occupying a seat but unable to handle conversations effectively, the administrator can force that agent offline to free up the seat for another available agent, ensuring optimal resource utilization.
How to set up an agent IP whitelist?
- Go to "Settings" > "Agent Management" and scroll down to find "IP Whitelist".
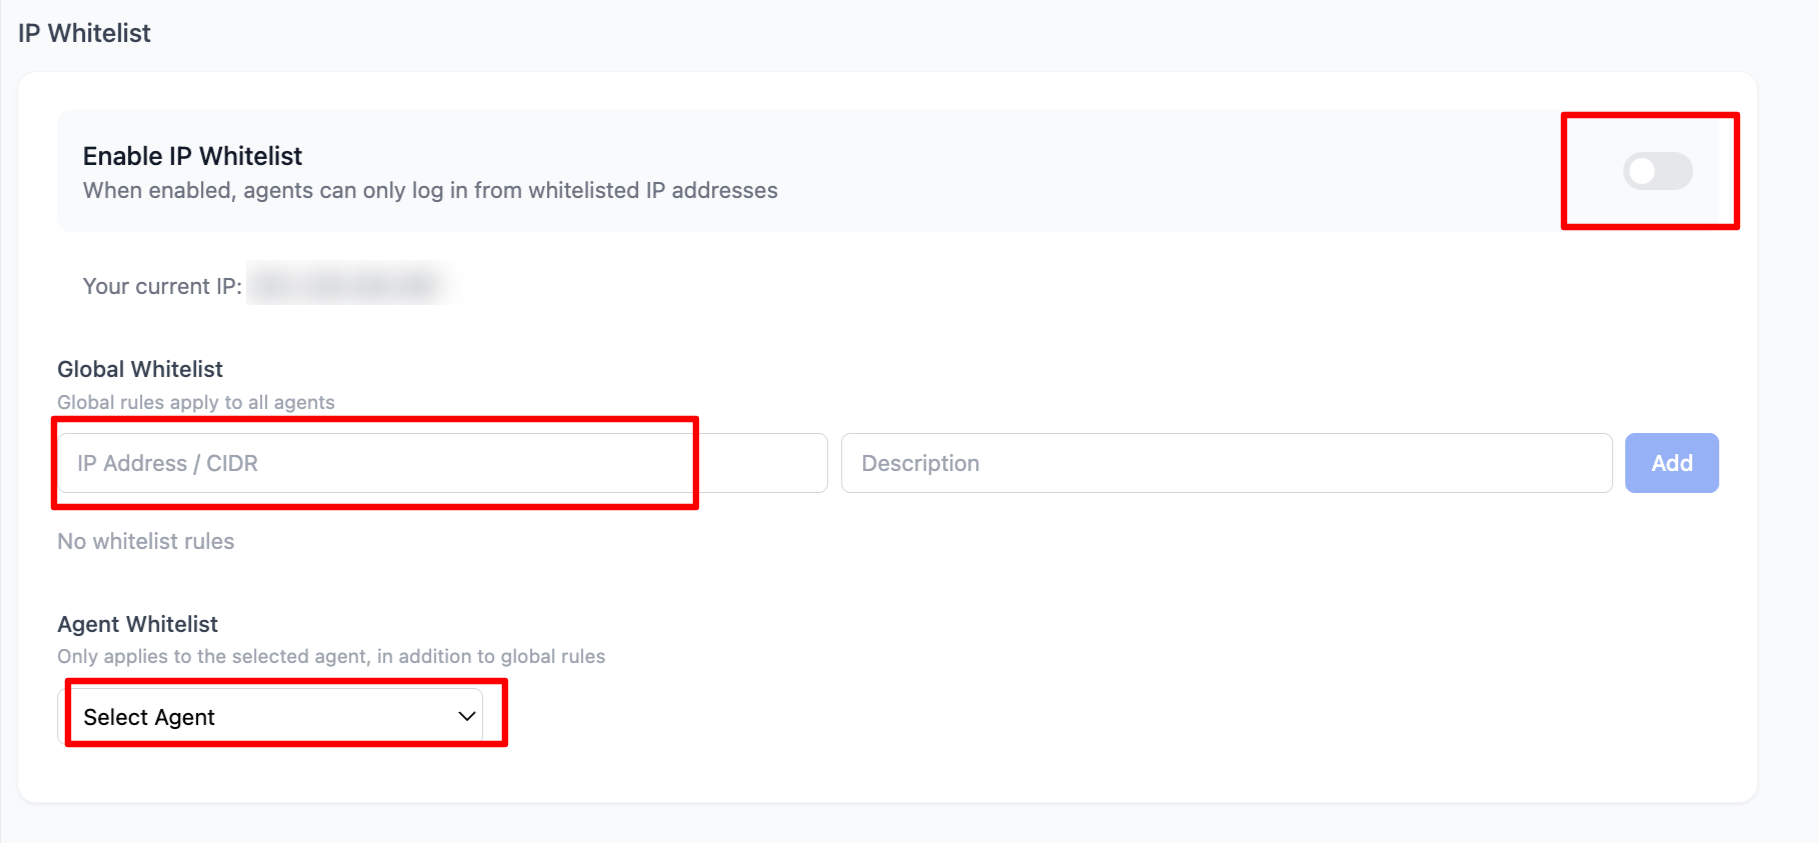
You can enable the IP whitelist to restrict agent account logins to specific IPs or IP ranges, preventing unauthorized access and potential security breaches.
🎉 Congratulations! You have completed the "Agent Management" module!
Through this module, you can effectively utilize your seat resources, create agent accounts, and help agents resolve account-related issues.