How to Bind a Custom Domain? (Detailed Tutorial)
Binding your own domain is essential for many businesses — it reduces platform dependency and enhances brand recognition and visitor trust.
In this tutorial, we will guide you step by step on how to bind your own domain in the Qiabot dashboard.

Step 1: Open the Settings Page
Go to the Qiabot dashboard and navigate to "Settings" > "Chat Links" > select a link to find the custom domain configuration section:
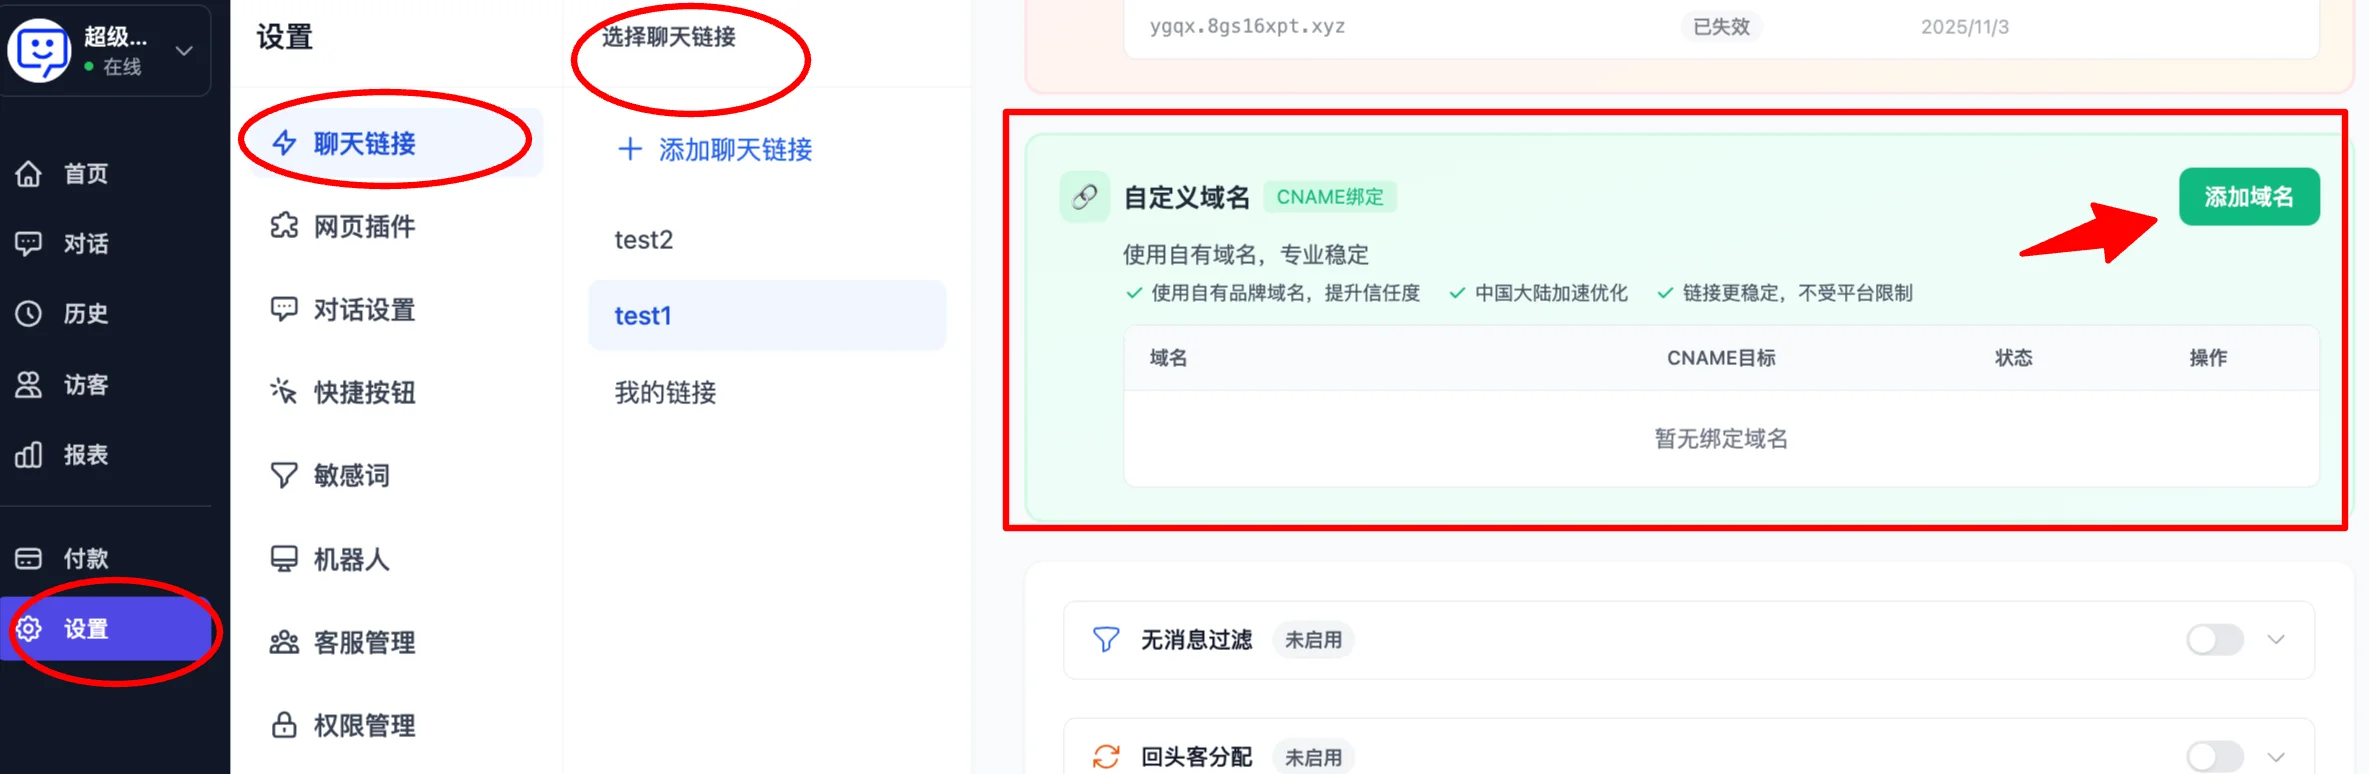
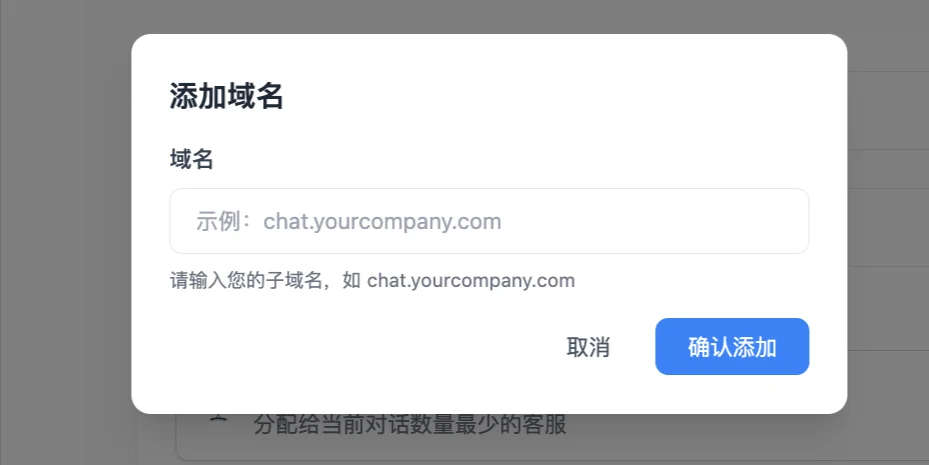
Step 2: Add a Domain
Click "Add Domain", then enter your subdomain in the popup:
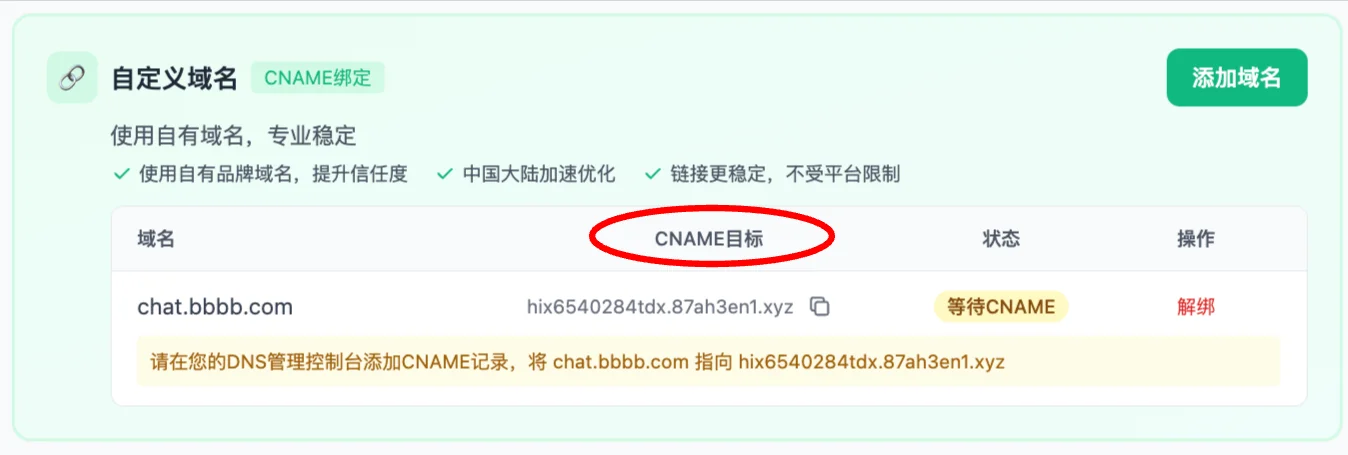
Step 3: Copy the Value
After successfully adding, you will see the CNAME target string generated by the system:
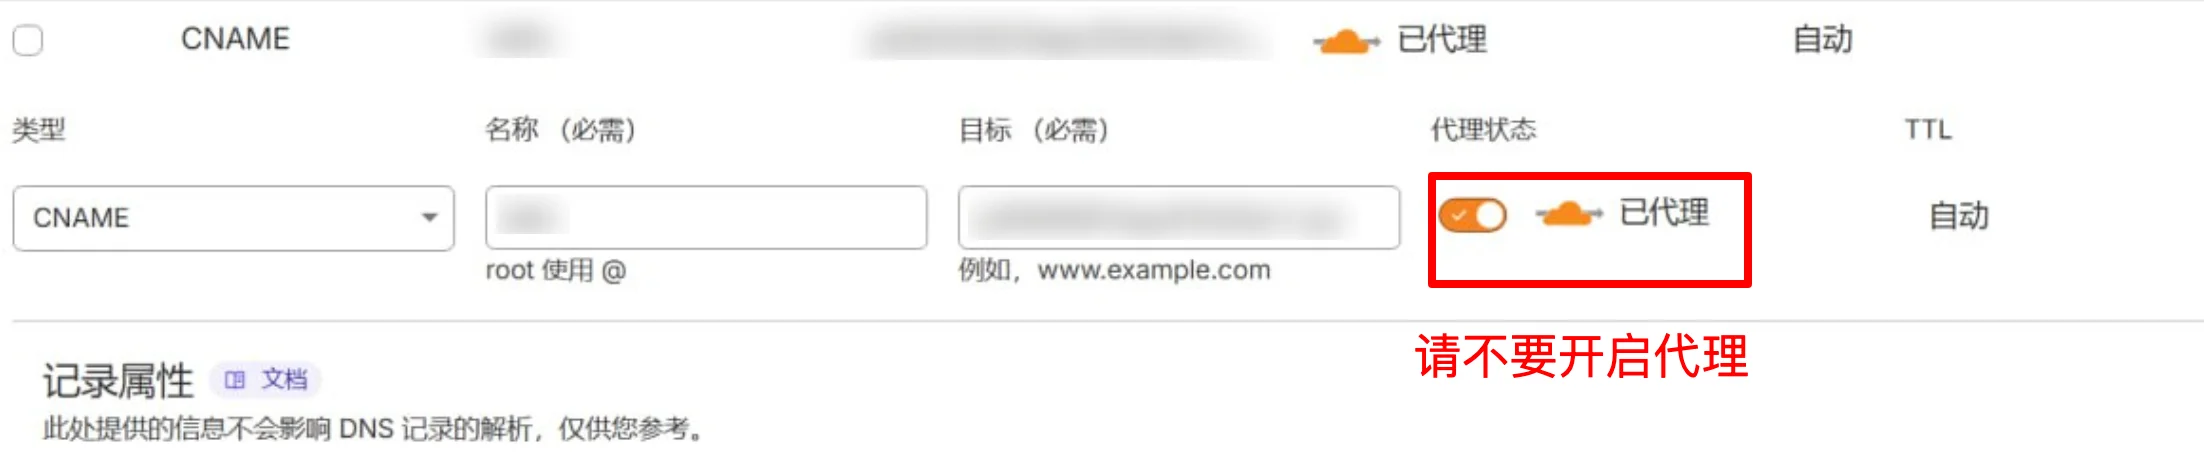
Step 4: Add a CNAME Record in Your DNS Management Console
Using Alibaba Cloud (screenshot) as an example:
Go to the Domain Management section, click DNS Settings for the domain you want to configure, click "Add Record", then fill in the information:

Note ⚠️: If you are using Cloudflare for DNS resolution, make sure to disable the proxy! Otherwise the CNAME will not work!
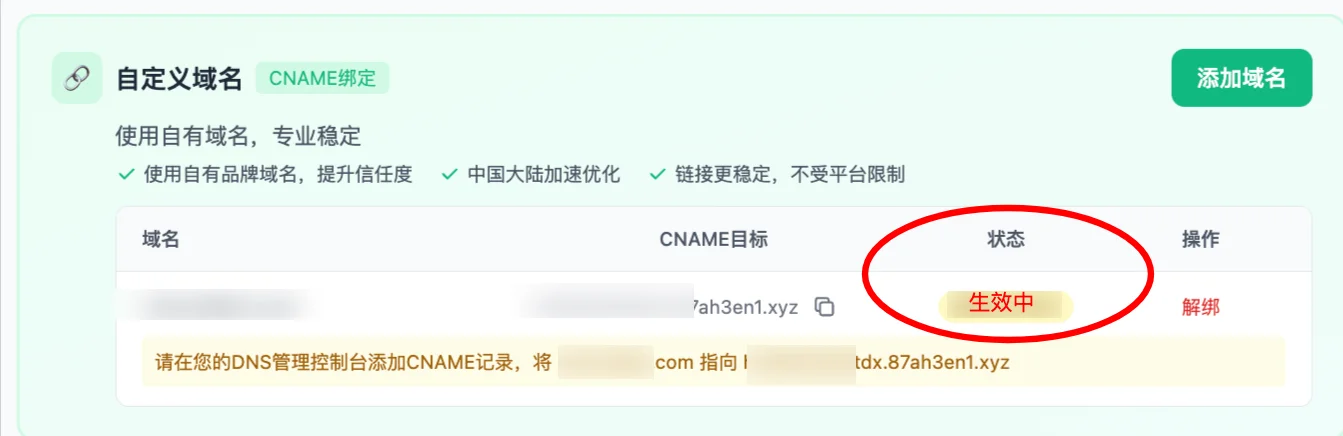
Step 5: Wait for DNS Resolution to Complete
The default TTL is typically ten minutes, depending on your configuration.
Once DNS resolution is complete, the "Custom Domain" status in the Qiabot dashboard will change to "Active".
You can then try visiting the link you configured.
Note ⚠️! Due to caching, the domain may not load immediately even after it takes effect. In that case, clear your cache or open the page in incognito/private browsing mode.